Attribute Dictionary
The Attribute Dictionary in ASM is the place where you can define, organize and use XACML attributes. These attributes can be used in the Policy Editor or PAP Client when authoring policies.
Attribute Dictionary management
An attribute consists of the following fields:
| Field | Description | Supported format |
|---|---|---|
| Name | A short and simple name for the attribute | A single case sensitive string adhering to the following constraints: - should be 1 to 255 characters long - should begin with a letter (a-z, A-Z) or an underscore (_) - can contain the letters (a-z, A-Z), digits (0-9), and underscores (_) only Cannot be any of the reserved words. |
| Namespace | This identifies the position of the attribute in the attribute hierarchy tree | Can consist of one or more case sensitive strings separated by the full-stop character .. These strings have the same constraints as for Name. Cannot be any of the reserved words. |
| ID | The XACML identifier of the attribute | URI |
| Description | Free-form description of the attribute | Any string without new line characters. |
| Category | XACML attribute category | One of five:access-subjectresourceactionenvironmentcustom categories |
| Data type | The XACML datatype of the attribute | x500NameipAddressyearMonthDurationrfc822NameintegerdayTimeDurationtimestringbase64BinarydatedoubleBooleanxpathExpressiondnsNamedateTimehexBinaryanyURI |
| Constraint | Limitations of the attribute values of attributes of type string and integer | See the Set attribute constraints section below for more information about constraints. |
By using constraints, attributes can be "subtyped" to hold only data that matches certain patterns, enumerations and ranges for the integer and string XACML data types. An example might be setting an enumeration, or list, of allowed values such as user, admin, manager for the subject attribute role of type string.
A key purpose of the Attribute Dictionary is its policy management use in the Axiomatics PAP Client or the Policy Editor.
The Attribute Dictionary is managed through the Attribute Dictionary view in the ASM GUI.
An attribute is uniquely identified by a particular combination of ID, name, namespace, category, and data type. In other words, two or more attributes having the same data type and ID can exist in different categories. Likewise, attributes with the same ID, category, and data type may be the same as long as the namespace for the attribute differs. If no ID is explicitly provided when an attribute is created, the system generates one by concatenating the name and the namespace, delimited by a full-stop character (.).
Reserved words

List and view attributes
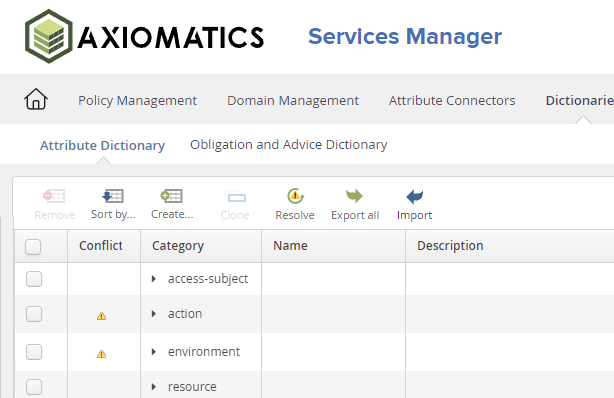
List all the attributes defined in ASM by clicking Dictionaries > Attribute Dictionary in the navigation control bar.
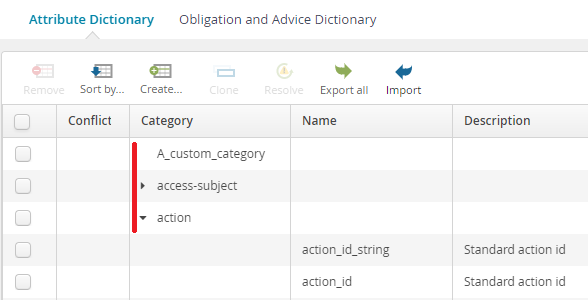
The standard mode is to display the listing sorted by category. Click the Sort by button in the toolbar to select a different sorting order.
By default, all attribute data (Category, Name, Description, Namespace, Data type) except constraints display in the list. For attributes that have defined constraints, a special icon appears in the Constraint column.
A small arrow icon indicates a node, that is, the item is being used in one or more attribute assignments.
-
Click the arrow icon to expand the list.
Changing the sorting mode will create new a new set of nodes based on the chosen data item.
-
Click a row to select an item in the list.
The side panel expands enabling basic editing of the item. For certain management actions, you will need to select the relevant check box. See the Modify an attribute section below.
Create an attribute
A new attribute can be created in two ways:
-
by creating it from scratch
-
by cloning an existing attribute
Create an attribute from scratch
-
Click the Create button in the toolbar above the attribute list.
A drop-down menu with the types of entities that can be created displays.
-
Select Attribute.
The side panel expands where you can fill in the information for the new attribute. A number of fields are required. See the Attribute Dictionary management section above for a full description of the attribute fields.
Name
The name of the attribute.
Namespace
Selected from a drop-down menu containing the available namespaces. See the Manage attribute namespaces in the Attribute Dictionary section for more information about namespaces.
Use default ID
By default this check box is selected, which means that on creation the default ID is used. Deselect the check box to enable the ID field for editing.
ID
If no ID is explicitly provided, the system generates one by concatenating the name and the namespace, delimited by a full-stop character (
.).Description (optional)
A text string describing the attribute.
Category
Selected from a drop-down menu containing the available categories. (See Manage attribute categories in the Attribute Dictionary for more information about categories.)
Data type
Selected from a drop-down menu containing the available data types.
Constraint (optional)
Limitations of the attribute values of attributes of type string and integer. If a limitation is selected in the drop-down menu, the value fields for the constraint are enabled. (See Set attribute constraints for more information about constraints.)
If you fail to include any required information when creating an attribute, a validation error message will display.
Clone an attribute
Attributes can also be cloned. ASM allows you to clone multiple entities simultaneously.
-
Select one or more rows on the attribute list by selecting the corresponding checkboxes.
-
Click the Clone button in the toolbar.
The cloned attributes display in the attribute list.
noteTo avoid confusion, numeric suffixes are automatically added to the name of each cloned item. The indexing system identifies the clone according to its sequential relation to the original attribute and to its subsequent iterations. For example, the suffix
-1-2indicates the item is the second clone made from the first clone generated. -
Modify the cloned attributes as needed.
noteOn cloning, the "Use default ID" check box is deselected, to allow for a choice of ID. Simply reselect the check box to use the default ID setting.
Modify an attribute
Modify an attribute as follows:
-
Select the attribute in the list.
The side panel expands.
-
Make the required changes.
You can edit the Name, ID, and Description fields, and select new values for namespace, category, and datatype from the drop-down menus. Also, you can add, edit, or remove constraints.
-
Click Apply to submit the changes.
ASM prevents you from duplicating attributes or creating attributes without name, ID, data type, or category.
If you fail to include any required information when editing an attribute, a validation error message will display.
Delete attributes
Delete one or more attribute by selecting the checkbox(es) to the left of the name(s) on the list and then clicking the Remove button in the action bar.
Manage attribute categories in the Attribute Dictionary
By default, the Attribute Dictionary in ASM contains four categories: access-subject, resource, action, and environment.
The user can create custom categories in the Axiomatics Services Manager. Custom categories and their attributes are just as accessible as default categories and their attributes. However, since they are not generated by the system, there are some differences in the way they are managed.
Create custom categories
Create a new category as follows:
-
Click the Create button in the toolbar above the attribute list.
A drop-down menu displays with the types of entities that can be created.
-
Select Category.
The side panel expands.
-
Enter a name (ID) for the new category and click Apply.
The new category is added to the Attribute Dictionary and will be available when creating attributes. The Attribute Category name can be specified in the ANY_URI format.
Edit custom categories
Edit a custom category as follows:
-
Select the custom category in the Attribute Dictionary by clicking on its row.
The side panel expands.
noteIt may be easier to find a category by clicking the Sort by button on the toolbar and selecting Attributes by Category as the sorting order.
-
Change the Category ID.
-
Click Apply to submit the changes.
It is not possible to edit default attribute categories.
Remove custom categories
A custom category that has been used for an attribute (indicated by the arrow icon next to it) cannot be removed until all these attributes have been given a new category assignment.
Remove a category from the Attribute Dictionary as follows:
-
Select the custom category in the Attribute Dictionary by clicking on its row.
-
Click the Remove button in the toolbar.
A confirmation dialog displays.
-
Confirm your action.
It is not possible to remove default categories.
Attribute management within the custom categories
Attribute management within custom categories is the same as within the default categories. You can add, edit, clone, and remove attributes as well as import and export the Attribute Dictionary.
If you import an attribute file with categories that are not present in the Attribute Dictionary, these categories will automatically be added to the dictionary.
If you import an Attribute Connector that contains one or more mappings to custom attribute categories that are not currently in the Attribute Dictionary, the side panel will expand where you can enter the required name. The imported attributes will then be available in the Attribute Mapping page of that Attribute Connector, but they will not be automatically added to the Attribute Dictionary. To make the custom categories generally available in the dictionary, they have to be manually entered.
Manage attribute namespaces in the Attribute Dictionary
APS 6.0 introduced attribute namespaces to facilitate the efficient organizing and managing of a large number of attributes. With namespaces, attributes can be organized in a hierarchical tree. The namespace of an attribute simply identifies its position in the tree. The namespace is not part of the formal definition of an attribute as per the XACML specification.
By default, the Attribute Dictionary in the Axiomatics Services Manager contains four namespaces (Attributes.access_subject, Attributes.resource, Attributes.action, Attributes.environment) corresponding to the categories access-subject, resource, action, and environment, respectively.
You can create new namespaces, and delete or edit previously created namespaces except for the default ones.
When an older version of APS is upgraded to version 6.x, all existing attributes are imported into a new Attribute Dictionary. Their ID, category, data type and associated constraints remain unchanged. Each attribute is also given a name.
Upon installation of APS 6.x over a pre-6.x version, the pre-existing Attribute Dictionary is updated according to the Axiomatics Services Manager migrating procedure. This step imports the attributes present in the attribute categories of the earlier version of the Axiomatics Services Manager into the attribute namespaces of the APS 6.x Attribute Dictionary. Thus the attribute categories access-subject, resource, action, and environment are imported into the attribute namespaces Attributes.access_subject, Attributes.resource, Attributes.action, and Attributes.environment, respectively.
Create namespaces
Create a new attribute as follows:
-
Clicking the Create button in the toolbar above the attribute list.
A drop-down menu displays.
-
Select Namespace.
An empty form displays in the expanded side panel.
-
Enter a name (ID) for the new category and click Apply.
The new namespace is added to the Attribute Dictionary and will be available when creating attributes. These strings have the same constraints as for Name, and they cannot be any of the reserved words in the list of reserved words above.
Edit namespaces
Edit a namespace ID as follows:
-
Select a namespace ID in the Attribute Dictionary by clicking on its row.
The side panel expands.
noteIt may be easier to find a category by clicking the Sort by button on the toolbar and selecting Attributes by Namespace as the sorting order.
-
Change the namespace ID.
-
Click Apply to submit the changes.
It is not possible to edit the default namespaces Attributes, Attributes.subject, Attributes.resource, Attributes.action, or Attributes.environment.
Remove namespaces
A namespace that has been used for an attribute (indicated by the arrow icon next to it) cannot be removed until all these attributes have been given a new namespace assignment.
Remove a namespace from the Attribute Dictionary as follows:
-
Select a namespace by clicking on its row.
The side panel expands.
-
Click the Remove button in the toolbar.
A confirmation dialog displays.
-
Confirm your action.
It is not possible to remove default namespaces. Any attempt to do so will generate a warning that the default namespace cannot be removed.
Set attribute constraints
Constraints can be set on allowed values for attributes of type integer and string. The constraints supported are those applicable to the data types integer and string in the XSD Restrictions specification summarized in the table below.
| Constraint | Applies to | Format |
|---|---|---|
| Enumeration | integer, string | A list of explicit values |
| Pattern | string | Any combination of: length maxLength minLength pattern whiteSpace |
| Range | integer | Any combination of: maxExclusive maxInclusive minExclusive minInclusive |
Set the constraints for an attribute as follows:
-
Select the attribute by clicking on its row.
The side panel expands.
-
Select the desired type of constraint from the Constraint drop-down menu.
The displayed options differ depending on the chosen constraint.
When a constraint has been defined for an attribute, this is indicated by a special icon in the Constraint column, except when Constraint is selected as the sorting order.
Enumeration
For an enumeration constraint, the GUI displays an input line per value. As soon as a value has been added by pressing enter or clicking outside the input field, an additional input line is generated. Add values/lines until all values in the enumeration have been set.
Pattern
A pattern constraint specifies a set of rules that an attribute of type string must match. Any combination of the available rules can be set.
The rules in a pattern constraint are added in a way similar to that used for adding enumerations. A rule type is selected from the drop-down menu and the value for the rule is entered into the text field. Once a rule is committed by pressing the enter button or clicking outside of the text field, a new empty line is created that allows another rule to be entered.
length
An integer specifying the exact length of the attribute value string.
maxLength
An integer specifying the maximum length of the attribute value string.
minLength
An integer specifying the minimum length of the attribute value string.
pattern
An XML schema regular expression that the entire attribute value string must match. (Refer to the XML schema regular expression for a full description of the regexp syntax.)
Examples: [a-z0-9]+ - matches any non-empty string containing only lowercase letters and numbers. T[0-9]4 - matches any string starting with a "T" followed by the integer range 0 to 9999.
Range
A range constraint sets a range for which an attribute of type integer is valid. Adding range restrictions is done by selecting a restriction from the drop-down menu. The value for the restriction is then entered into the text field. Once a restriction is committed by pressing the enter button or clicking outside of the text field, a new empty line is created that allows another restriction to be entered.
maxExclusive
The maximum integer value the attribute is allowed to have up to but not including the restriction value itself.
Example: A maxExclusive of 100 will allow a maximum attribute value of 99
maxInclusive
The maximum integer value the attribute is allowed to have.
Example: A maxInclusive of 100 will allow a maximum attribute value of 100
minExclusive
The minimum integer value the attribute is allowed to have. This can go down to but not include the restriction value itself.
Example: A minExclusive of 0 will allow a minimum attribute value of 1
minInclusive
The minimum integer value the attribute is allowed to have.
Example: A minInclusive of 0 will allow a minimum attribute value of 0.
Export the Attribute Dictionary
The Attribute Dictionary can be exported as an RDF file for use in the Axiomatics PAP client or as an XML file that can be imported again into a Axiomatics Services Manager instance.
Export the entire dictionary as follows:
-
Click the Export all button in the toolbar.
A dialog box displays.
-
Select the export file format of your choice.
-
Click OK.
The default file names for the exported Attribute Dictionary are attribute.ttl or attribute.xml, depending on the selected format.
The XML format is supported in Axiomatics Policy Server 6.0 and higher only. An XML export of the dictionary includes the namespace and name as part of the exported attribute definition, but these are not included in a TTL export.
Import the Attribute Dictionary
Attributes can be imported from a file into an Attribute Dictionary by clicking the Import button in the toolbar. This action will not replace existing attributes; it simply adds attributes not already present in the Attribute Dictionary. If an attribute is present in the Attribute Dictionary but not in the file that is imported, the attribute will remain in the dictionary.
For attributes that are considered the same from an XACML perspective (same ID, category and data type) but that otherwise have a conflicting definition (different description and constraints), the import function will display an icon in the Conflict column indicating that there are conflicts that need to be resolved. See the Resolve conflicts in attributes section below for more information.
As of Axiomatics Policy Server 6.0, whenever attributes are imported from a TTL file, a name and namespace based on the corresponding XACML identifier and XACML category are automatically generated for every attribute. When an attribute already present in the dictionary has the same name and namespace as an attribute being imported from the TTL file, the attributes will be in conflict. Such conflicts can be resolved as described in the paragraphs below.
Resolve conflicts in attributes
Conflicts may arise when an imported file contains attributes that are considered the same from an XACML perspective (same ID, category and data type) but that otherwise have a conflicting definition (different description and constraints). However, it is also possible for a conflict to occur after an attribute has been edited. In both cases, the built-in conflict resolution tool is used.
After an import has finished, a status message displays informing you whether any conflicts were encountered. If that is the case, a warning icon displays in the Conflict column, and the Resolve button in the toolbar is enabled.
-
Click the Resolve button in the toolbar.
The Resolve conflict window displays. All conflicting attributes are highlighted along with their fields.
-
Resolve the conflict in each case by selecting to keep either the old or the new conflicting attribute.
-
Click Resolve.
A summary of the resolved attribute definition displays.