Domain management
Use the Axiomatics Services Manager to manage authorization domain configurations to an Authorization Service.
Authorization domains are central to the Axiomatics' methodology for defining authorization policies. Essentially, they are logical containers used to organize and manage all the components necessary in evaluating access requests and returning appropriate authorization responses.
A domain groups the following data:
- Policies: The set of rules that define access logic (who can do what under which conditions).
- Attributes: The vocabulary of the authorization system (user roles, resource sensitivity, action IDs, etc).
- Attribute connectors: The components that link to external data sources, such as a database or LDAP directory, to dynamically fetch the real-time values needed to evaluate and resolve access requests.
- Attribute cache: A cache used to store attribute values retrieved from attribute connectors, aiming to enhance performance.
- Partial evaluation threshold: An indicator specifying the minimum number of individual requests a multiple-decision request must contain before the authorization engine attempts to optimize it.
These bundles form aggregates of domain data, which are then used to evaluate access requests and produce "permit" or "deny" responses.
Authorization domain file
The data of the authorization domain is stored in an authorization domain configuration file. This file contains a collection of policies and settings, including attribute connectors and cache configurations. To learn more about this file and its various sections, read the Authorization domain file analysis section of the Authorization Domain Manager (ADM) documentationOpens in a new tab.
Interface
Access the Domain Management page by clicking the Domain Management link in the navigation control bar.
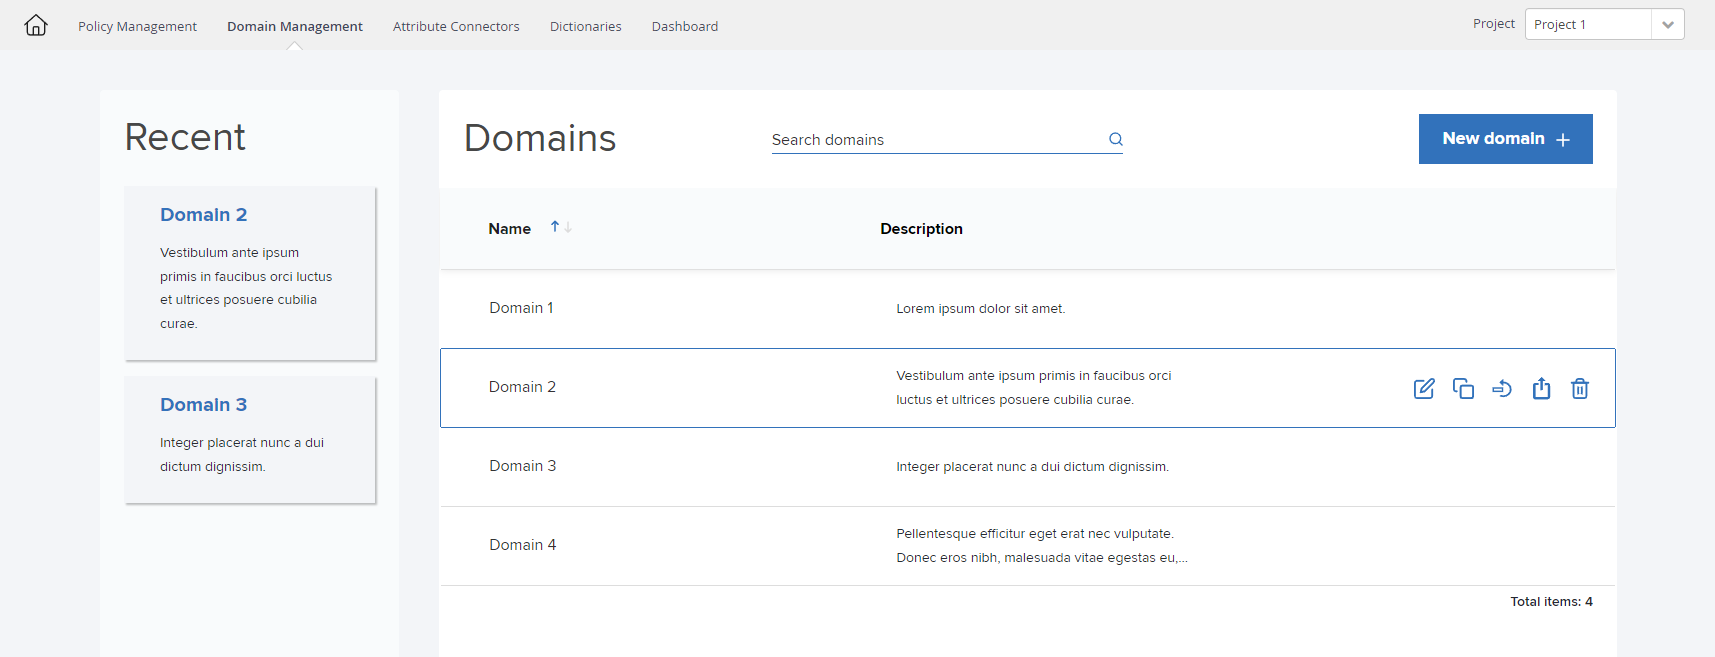
This page displays the most recently viewed or edited domains on the left, and a list with all available domains along with a search function in the main area.
On this page, you can perform the following actions:
-
Hover the mouse pointer over the recently visited domains or a row in the list to reveal a line of buttons: Copy, Roll back, Export, and Delete. By clicking one of these buttons, you can directly initiate that action for the selected domain.
-
Click a row in the domains list to display the domain page, where you can view and edit the configuration of that domain.
-
Click New domain on the right to create a new domain. See Create a domain for a description of the authorization domain content.
-
Use the search field to look up domains by name and narrow down the domains listed.
noteThis is a dynamic search field and returns relevant results as you type.
Create a domain
-
Go to the Domain Management page.
-
Click New domain on the right of the page.
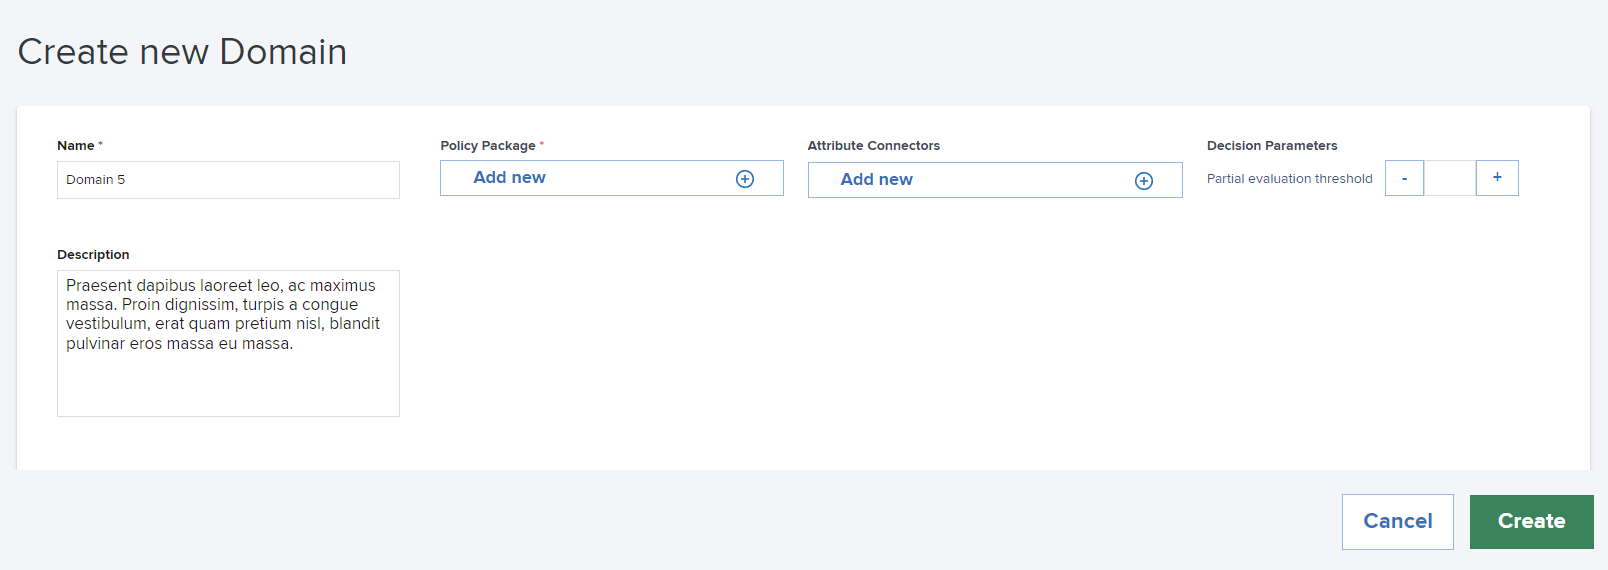
The Create new Domain page displays where you can specify the domain configuration.
-
Enter and/or select the required information as described in the following sections.
-
Finally, click Create in the lower right corner of the page to finish.
Name and description
-
In the Name field, enter a name for the new domain. The name is used to refer to the domain within the Axiomatics Services Manager GUI.
warningThe length of a domain name is limited to 500 characters.
-
Optionally, provide more details about the domain in the Description field.
Policy Package
A Policy Package is a data structure that contains XACML policies and/or policy sets that can be assigned to a domain. A policy package is a required component of the domain.
Any software tool, including plain text editors, with which you can produce XACML 3.0 compliant policies can be used to create policy packages.
There are three tools provided by Axiomatics that you can use to create policies: the Policy Editor within ASM, the Policy Administration Point (PAP), and the Axiomatics Language for Authorization (ALFA) plugin and compiler.
Policies created in the Policy Editor are automatically added to the library. Policies created with external tools must be imported to the library to become available for selection. See Import a Policy Package for more information.
If changes are made to a policy package in the Policy Editor, these changes are not automatically transferred to the domain. To update the policies in the domain, select the policy package again to reload it with the latest version.
-
Click Add new under the Policy Package heading.
A dialog box is displayed with a list of available policies in the Policy Package Library. The list is searchable.
-
Use the search field to find a specific policy package or go through the list.
noteThis is a dynamic search field and returns relevant results as you type.
-
Click a policy package in the list to select it.
-
Click Save to add it to the domain.
noteThe simplest possible domain configuration requires only a Policy Package. The absence of Attribute Connectors implies that all attribute references in the Policy Package are provided by the Policy Enforcement Point (PEP).
Attribute Connectors
A domain can be configured with zero or more attribute connectors. An attribute connector is required when attributes used in a policy need to get their values from an external source such as a database or an LDAP directory. A source of such data is called a Policy Information Point (PIP). The authorization engine connects to a PIP through an attribute connector.
The attribute connector contains information about the type of attribute source (for example, LDAP, or SQL), the XACML attributes it provides, and how to obtain them (query strings specific to the PIP type and instance). The attribute connectors themselves are then used at runtime during policy evaluation.
See the Attribute Connector Management topic for more information about attribute connectors.
-
Click Add new under the Attribute Connectors heading.
A dialog box is displayed with a list of the available attribute connectors. The list is searchable.
-
Use the search field to find a specific attribute connector or go through the list.
noteThis is a dynamic search field and returns relevant results as you type.
-
Click an attribute connector in the list to select it.
More than one attribute connector can be selected. Click again on a selected item to deselect it.
-
Click Save to add the selected attribute connector(s) to the domain.
Each attribute connector is represented in the panel. Scroll the list of attribute connectors if necessary.
noteIf changes are made to an attribute connector configuration in the Attribute Connectors section, these changes are not automatically transferred to the domain. To update the attribute connector in the domain, select it again to reload it with the latest configuration.
Decision parameters
This optional property controls how the authorization engine should attempt to perform multiple-request optimization. In some cases this can improve the performance of authorization engine. In some special cases it may have a negative impact on performance. The actual improvement depends on several factors, for example, the structure of the request and the structure of the policy.
Enabling this property means that the authorization engine will attempt to perform multiple-request optimization.
The threshold value indicates how many individual requests a multiple-decision request should contain before the authorization engine attempts to optimize that specific multiple request.
This setting is enabled by entering a value in the Partial Evaluation Threshold field in the Decision parameters block. You can enter a value directly or click the plus or minus buttons to set a value.
If enabled, two requirements apply:
- the value must be an integer
- the value must be between 2 and 9999 (0 and 1 are not allowed)
If the threshold value is set too low, it may reduce performance. If the threshold value is set too high, it is less likely that it will be reached. The correct number cannot be determined without testing.
Edit a domain
To view and/or edit a domain, go to the main Domain Management page and click a row in the list of domains.
The domain page displays, where you can edit the information, and change the selected policy package and/or attribute connectors.
Change or delete the policy package
A policy package is required for a valid domain configuration.
To change the policy package:
- Click the Pen icon to open the list of available policy packages.
- Use the search field to find a specific policy package or go through the list.
- Click a policy package in the list to select it.
- Click Save.
To delete the policy package:
- Click the - icon to remove the policy package from the domain configuration.
note
If changes are made to a policy package in the Policy Editor, these changes are not automatically transferred to the domain. To update the policies in the domain, select the policy package again to reload it with the latest version.
Change or add attribute connectors
-
To add an attribute connector to the domain configuration, click Add new under the Attribute Connectors heading.
-
To view information about the attribute connector, click the eye icon.
-
To remove an attribute connector, click the - icon for an attribute connector to remove it.
If changes are made to an attribute connector configuration in the Attribute Connectors section, these changes are not automatically transferred to the domain. To update the attribute connector in the domain, select it again to reload it with the latest configuration.
Save an updated domain
If you have updated any part of the domain configuration, you need to save the domain for the changes to take effect.
-
Click Save to save the edited domain configuration and return to the main Domain Management page.
-
Alternatively, click Cancel to abort all changes and end the editing session. This will also return you to the main Domain Management page.
Export a domain
Export the domain content as a YAML-format file as follows:
-
There are two ways to initiate the export operation:
-
From the main Domain Management page, click the Export button in the row of buttons that appear when you hover the mouse pointer over a recently visited domain or a row in the list of domains.
-
From a domain page, click Export button in the tool bar in the upper right part of the domain page.
-
-
A standard file system dialog displays.
-
Navigate to the directory you want to save the domain file
-
Click Save.
Delete a domain
-
There are two ways to delete a domain:
-
From the main Domain Management page, click Delete button in the row of buttons that appear when you hover the mouse pointer over a recently visited domain or a row in the list of domains.
-
From a domain page, click the Delete button in the tool bar in the upper right part of the domain page.
-
-
A confirmation dialog box displays.
-
Confirm that you want to go ahead with the deletion or click Cancel to abort the operation.
What is being deleted here is the mapping, or association, of the domain name to the project, not the actual domain. The domain itself cannot be deleted, and the domain ID remains unchanged for audit and forensic purposes.
Copy a domain
You have the option to copy the content of one domain to another, which can be useful when developing authorization domains.
There are two ways to initiate the copy operation:
- From the main Domain Management page, click the Copy button in the row of buttons that appear when you hover the mouse pointer over a recently visited domain or a row in the list of domains.
- From a domain page, click the Copy button in the tool bar in the right corner of the domain page.
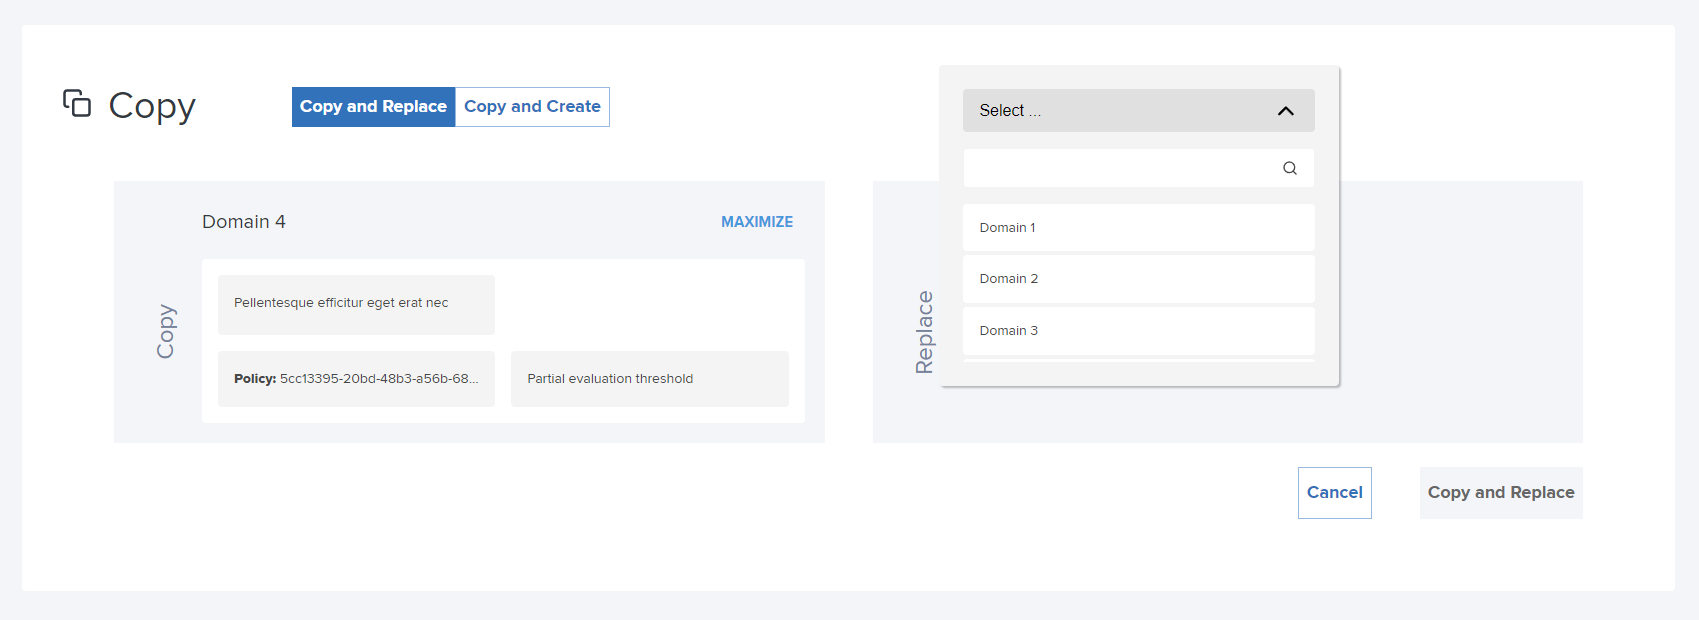
The Copy page displays, showing the selected (or source) domain in the left panel. Click the MAXIMIZE button to expand the view of the domain information. Click MINIMIZE to return.
Copying can be performed in two different ways:
-
Copy and Replace - A source domain is selected and copied to a target domain, thereby replacing the existing contents of the target domain.
-
Copy and Create - A source domain is selected, a new name is entered, and the new domain is created as part of the Copy operation.
Except for the name, the source domain is copied over to the target domain in its entirety. It is not possible to copy only subsets of domain content.
The selected copy method controls which options are available in the operation.
Copy and Replace
-
Click the Copy and Replace button to select copy method.
-
Select a target domain in in the Choose domain drop-down menu.
The panel on the right now displays the selected target domain, the contents of which will be replaced by the contents of the domain shown in the left panel.
The configuration is not editable in this view, but you can click the Eye icon to view information about the attribute connector(s) assigned to the domain.
-
Click the Copy and Replace button to execute the operation, or Cancel to abort.
Copy and Create
-
Click the Copy and Create button to select copy method.
-
Enter a name for the new domain in the text field.
-
Click the Submit button.
The panel on the right now displays the new domain configuration and the new domain name.
The configuration is not editable in this view, but you can click the Eye icon to view information about the attribute connector(s) assigned to the domain.
-
Click the Copy and Create button to execute the operation, or Cancel to abort.
Roll back a domain
This operation is used to revert to an older version of a domain, for example, when a revision to a domain does not go as planned.
The Roll back functionality is only supported for ASM users that have the domain-auditor role assigned to them. Read the Map user roles section for more information.
This is done by selecting a historical version of the domain to go back to, based on time and domain ID, and that will restore the domain to its previous state represented by the domain ID.
There are two ways to initiate the roll back operation:
- From the main Domain Management page, click the Roll back button in the row of buttons that appear when you hover the mouse pointer over a recently visited domain or a row in the list of domains.
- From a domain page, click the Roll back button in the tool bar in the upper right corner of the domain area.
The Roll back page displays.
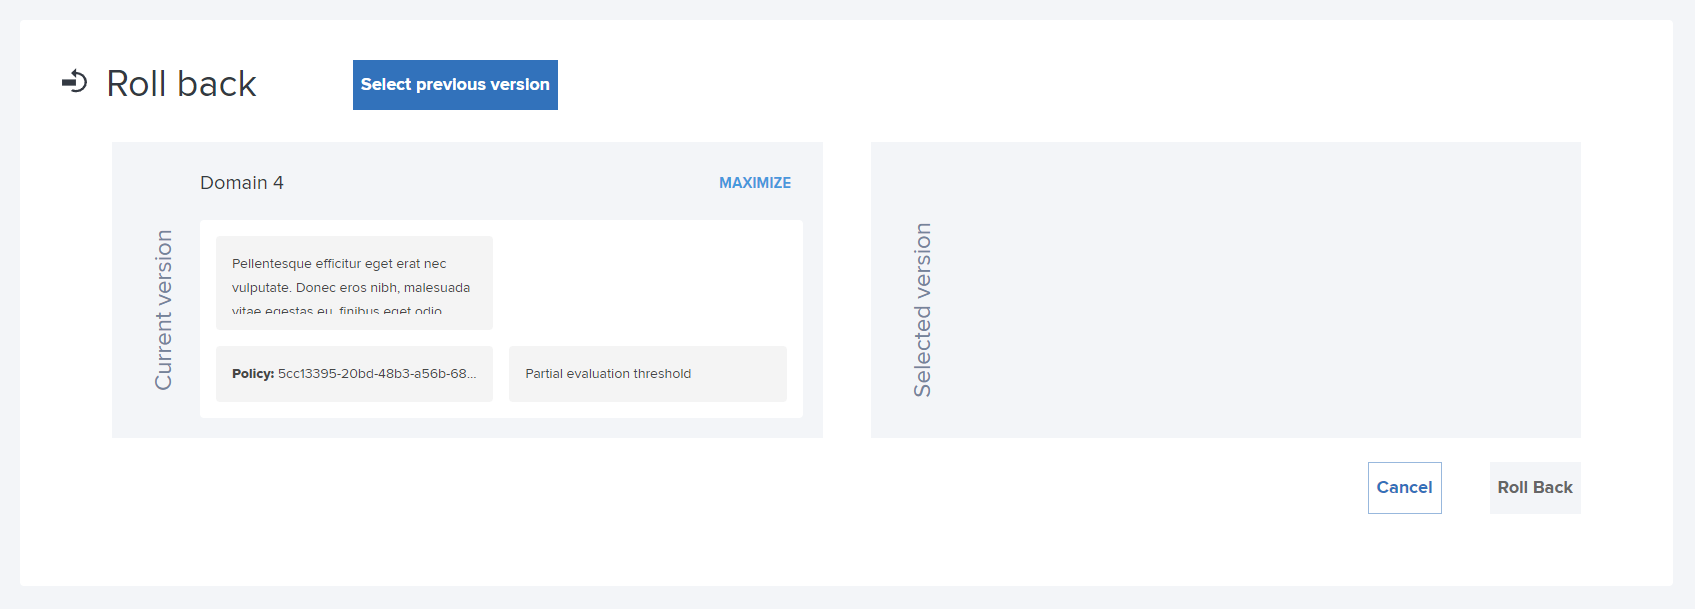
The current version of the domain displays in the left panel. Click the MAXIMIZE button to expand the view of the domain information. Click MINIMIZE to return.
-
Click Select previous version.
A list of previous versions displays.
-
Select the previous version that you want to roll back to .
All the historical instances of this domain are listed together with domain IDs and a time stamp showing when it was in use.
The panel on the right now displays the selected version of the domain, where you can review it. The configuration is not editable in this view, but you can click the Eye icon to view information about the attribute connector(s) assigned to the domain.
-
Click Roll Back to execute the operation or Cancel to abort.
Domain management API
It is possible to manage domains by calling the endpoints directly as an alternative to using the UI. This domain management API is supported by the Authorization Domain Manager (ADM). Read the Endpoint addresses for operations section of the Authorization Domain Manager (ADM) documentationOpens in a new tab for details.
Namespaces in the API are the project names in ASM.
Special characters in URLs must be UTF-8 encoded. For example, Project 1 becomes Project%201.