Managing users in Keycloak
During the installation of ASM, a Keycloak service is also installed, to serve as an authentication module.
Only a default administrative user is created automatically during the installation. All other users must be created and assigned a role in Keycloak, before they can log in to ASM.
Logging in to Keycloak for the first time
Open a web browser window and go to https://localhost/auth.
- Default username:
admin - Default password:
admin
Note: Axiomatics strongly recommends immediately changing the password. See Keycloak: User Credentials for information on how to do this.
Creating a user in Keycloak
All users (except the default administrative user) must be created and assigned a role in Keycloak before they can log in to ASM.
- Open a web browser window and go to [
https://localhost/auth]. - Log in to the Keycloak administration console and go to the ASM realm.
- In the Manage section on the left, click Users.
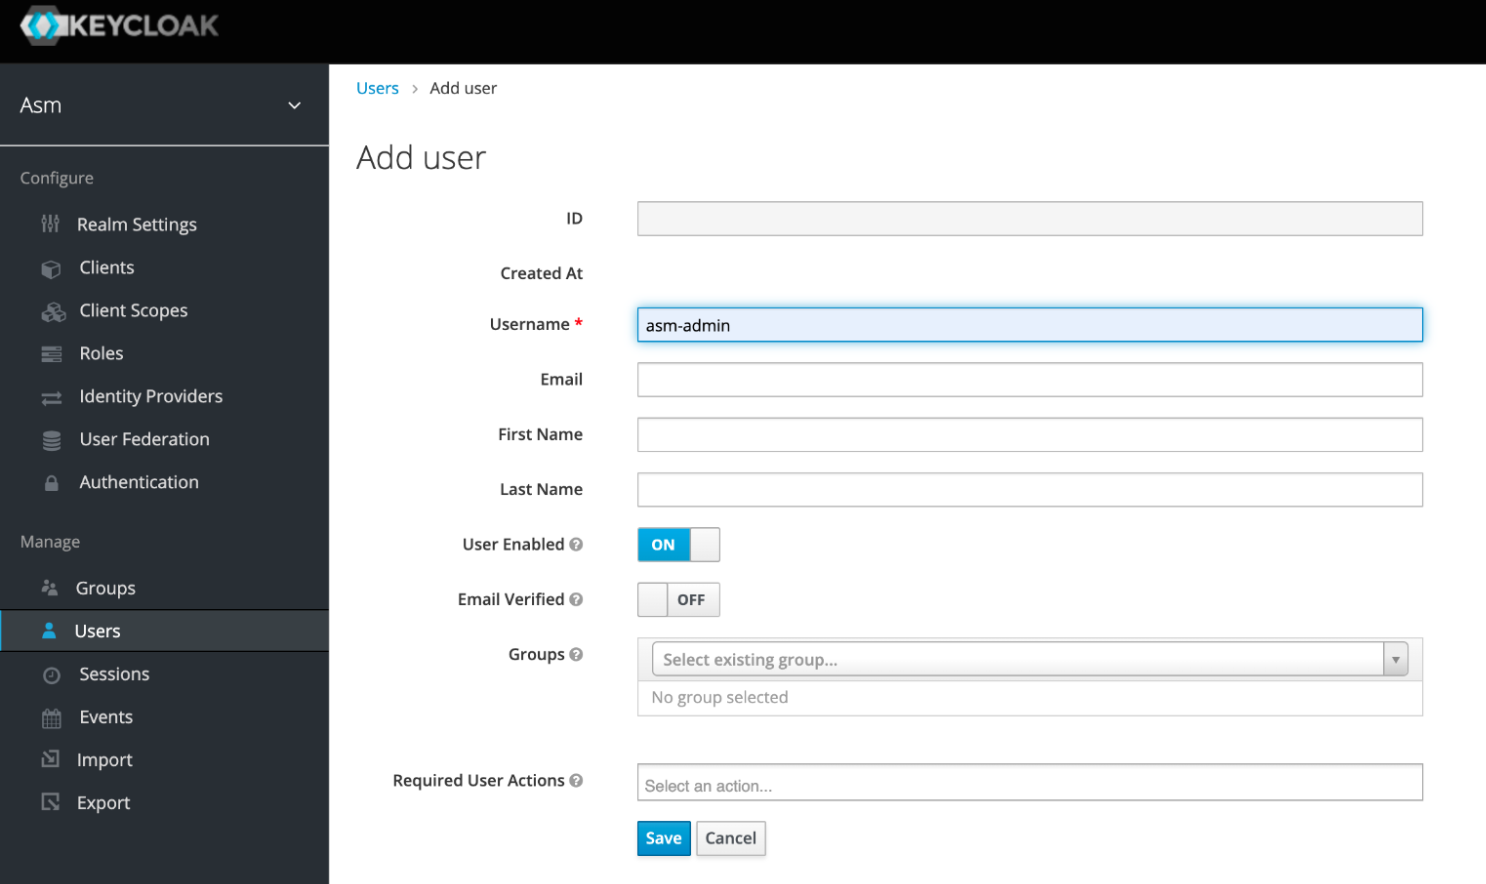
- Click the Add User button.

The Add user page is displayed.
- Enter a name in the Username field (required). The other fields are optional.
- Click the Save button.
- Go to the Credentials tab.
- Enter a new password and confirm it in the Password fields.
- Click the “Temporary” switch to turn it OFF.
- Click the Set Password button.
Repeat for as many users you want to add to the system.
Note: The characters ':', '[', ']', '|', and '*' are not allowed in the username.
Mapping the user roles
- In the Manage section on the left, click Users.
- Select the user you want to map roles for.
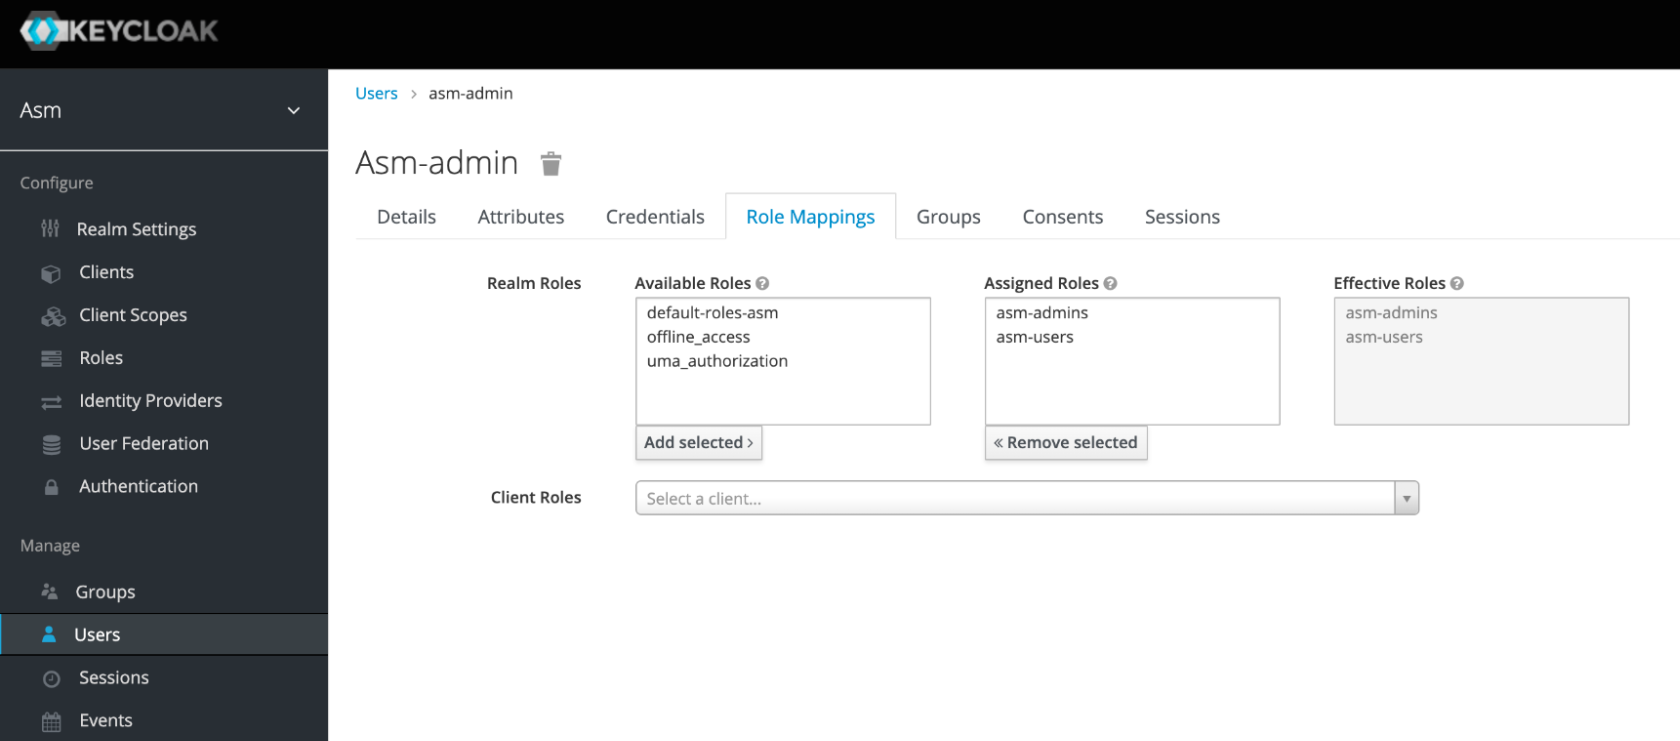
In the window that is displayed, go to the Role Mappings tab.

- In the “Available Roles” list, select the roles that you want to assign to the user (asm-admins or asm-users or both).
- Click the Add selected button.
The roles are added to the "Assigned Roles" list for the selected user.
Note: The example shows a user that has been assigned both roles, which is recommended for the administrator to be able to work with projects and the administration view.
Deleting a user in Keycloak
- Log in to the Keycloak administration console and go to the ASM realm.
- In the Manage section on the left, click Users.
- Select the user you want to delete.
- Click the Trashcan icon to delete the user.
- Go to ASM and delete the user from project assignments and the list of users.