Configuring Keycloak clients for ADS
To enforce authorization and project permissions, a mapper must be configured in Keycloak to map project permissions to claims when ADS is accessing a domain in the domain manager of ASM. The process requires a number of steps.
Note: The following information assumes the system administrator has access to the Keycloak administration console. See Logging in to Keycloak for the first time for first-time login instructions.
Step 1: Configure a client for the ADS instance
- Open a web browser window and go to
https://localhost/auth. - Log in to the Keycloak administration console and go to the ASM realm.
- In the Configure section on the left, click Clients.
- Click the Create button at the top right of the table.
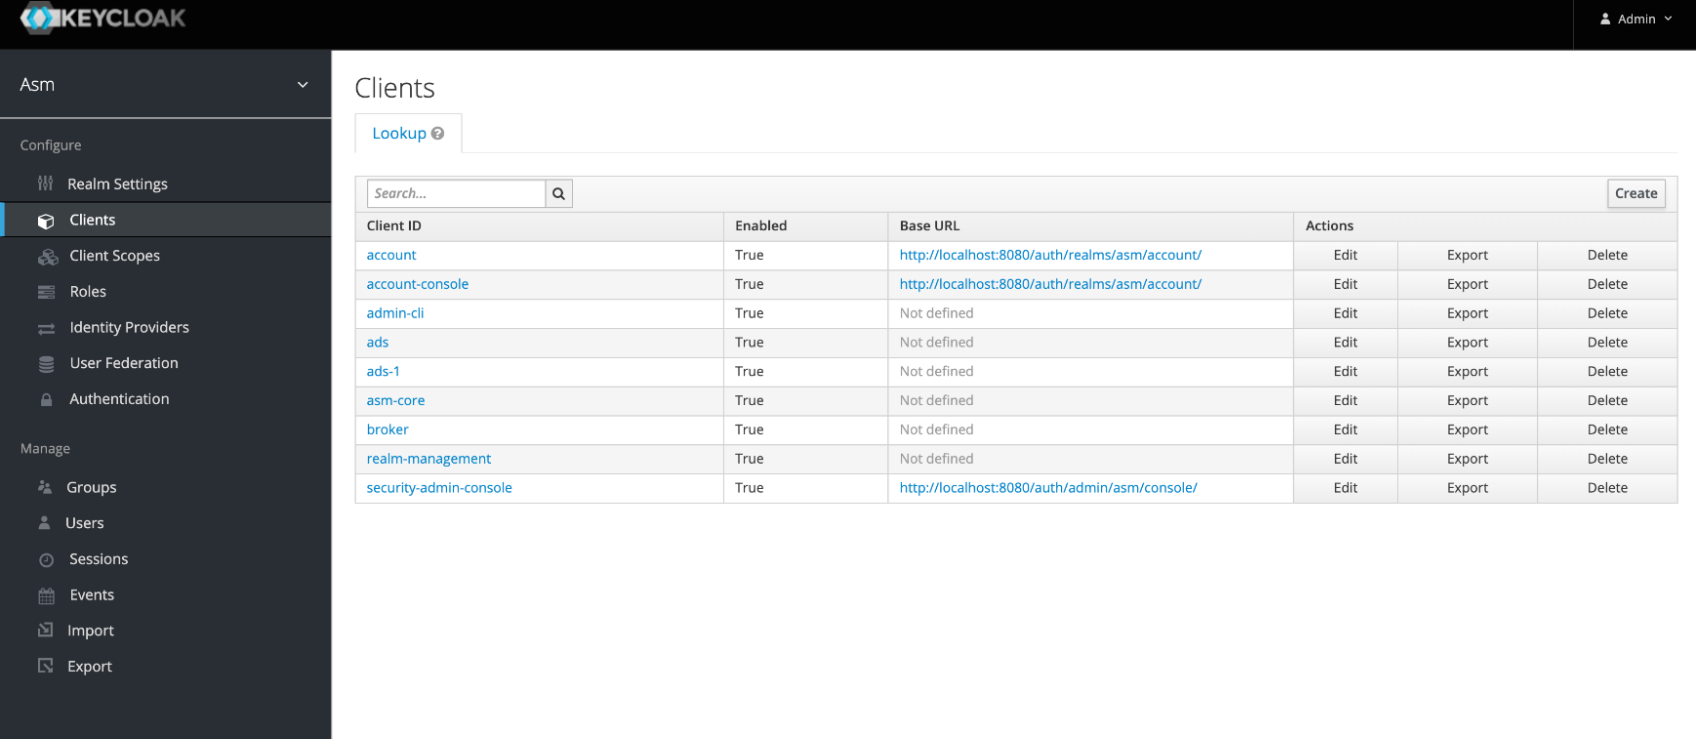
The Add Client view is displayed.
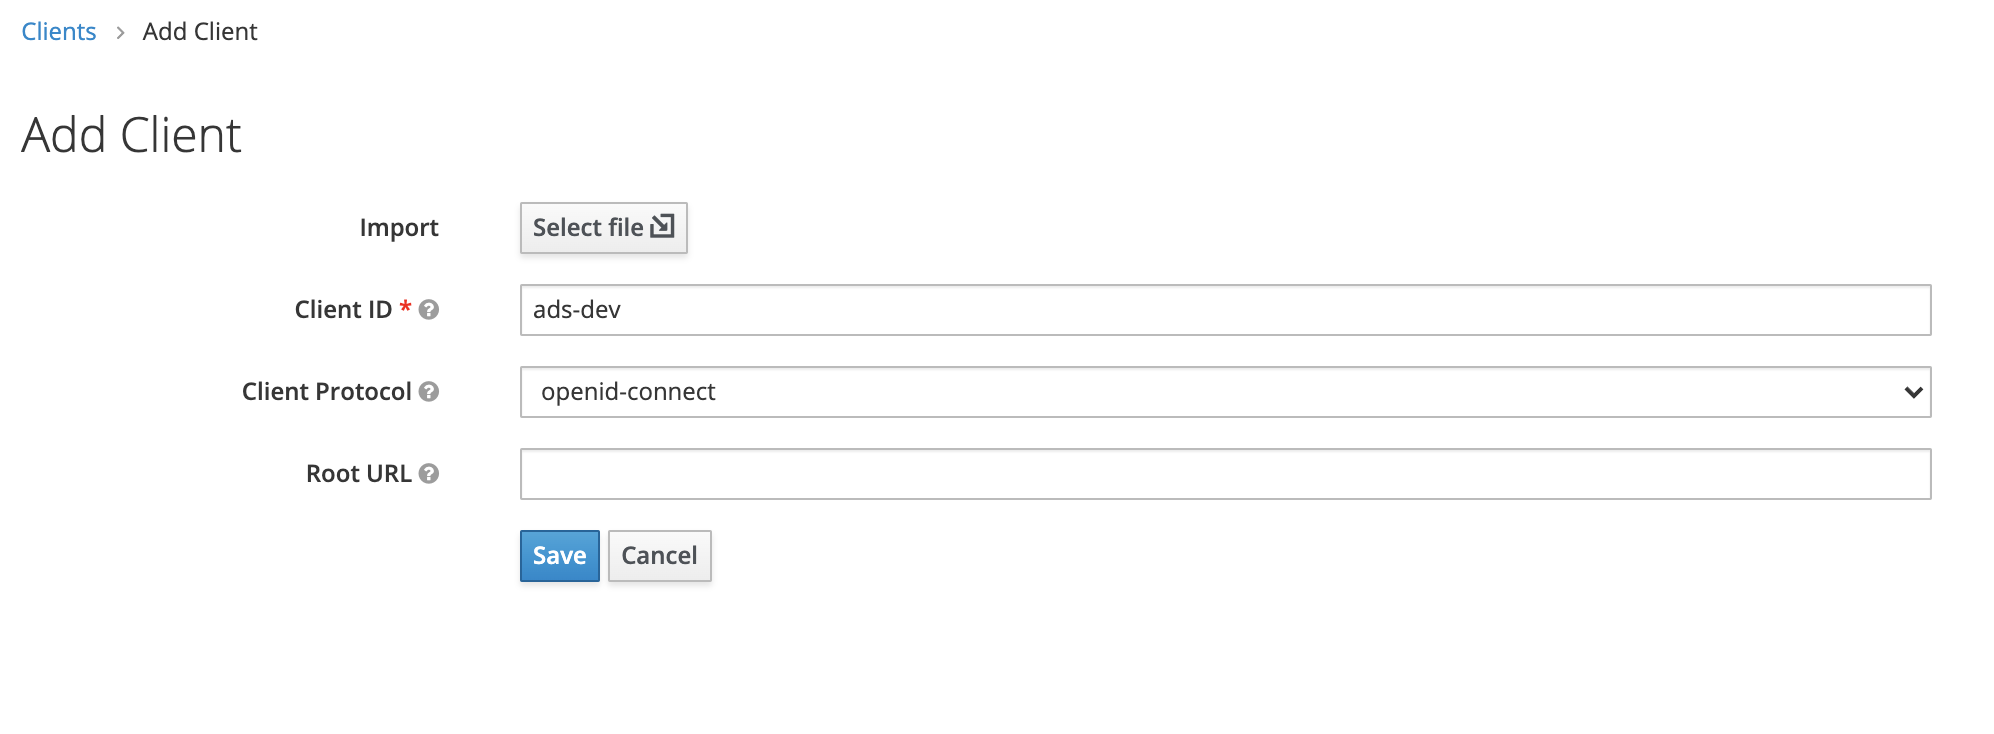
- Enter a descriptive Client ID.
- In the Client Protocol drop-down menu, select "openid-connect".
- Leave the Root URL field empty.
- Click Save to finish.
You are returned to the Clients list.
- Access the Client Configuration page for the client you just created.
- Go to the Settings tab.
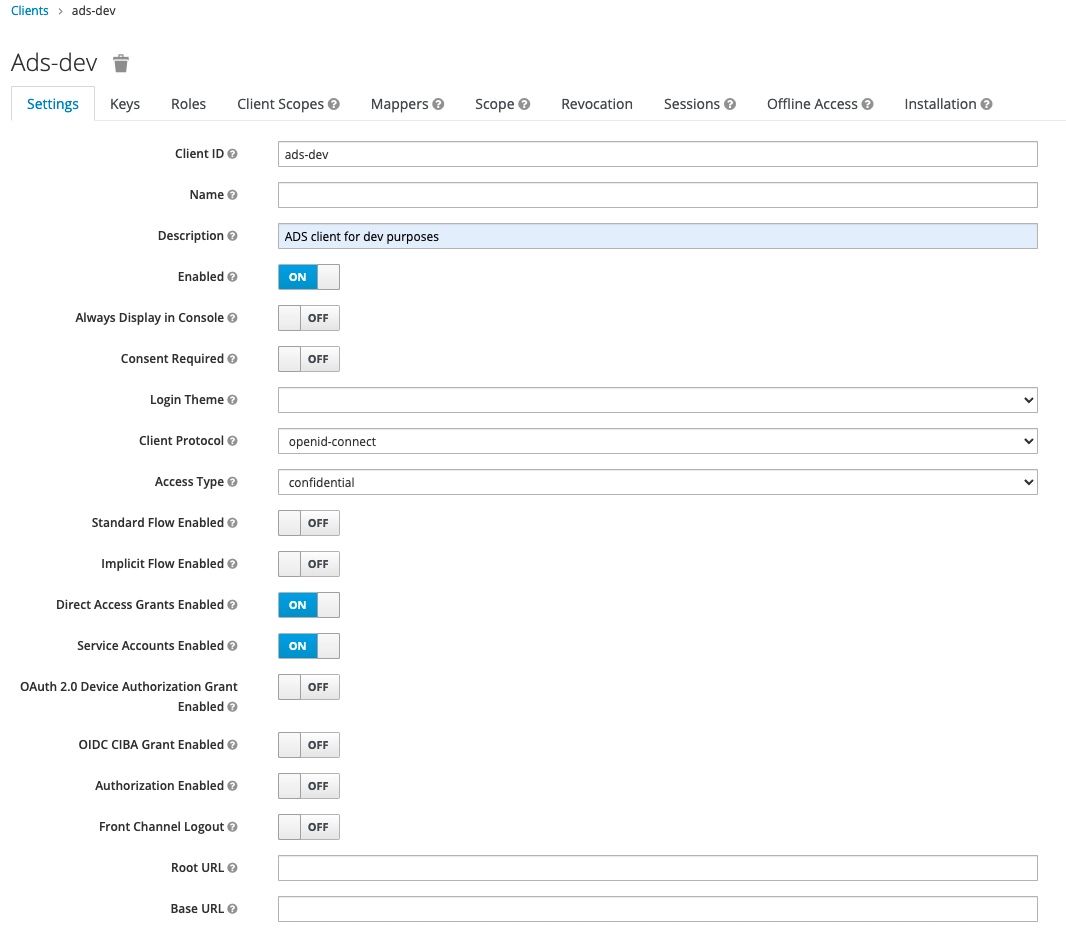
- Enter a Description to clarify the purpose of this client (optional).
- In the Access Type drop-down menu, select "confidential".
- Set Standard Flow to OFF.
- Set Service Account to ON.
- Leave the other settings at their defaults.
- Click Save to save the configuration.
Once the Settings configuration has been saved, the Credentials tab of the Client Configuration page becomes available. There you will find the Client Secret, which has been generated and is ready for use.

Step 2: Create a mapper for the namespaces claim
- Access the Mappers tab of the Client Configuration page.
- Click the Create button at the top right of the table.

The Create Protocol Mapper view is displayed.
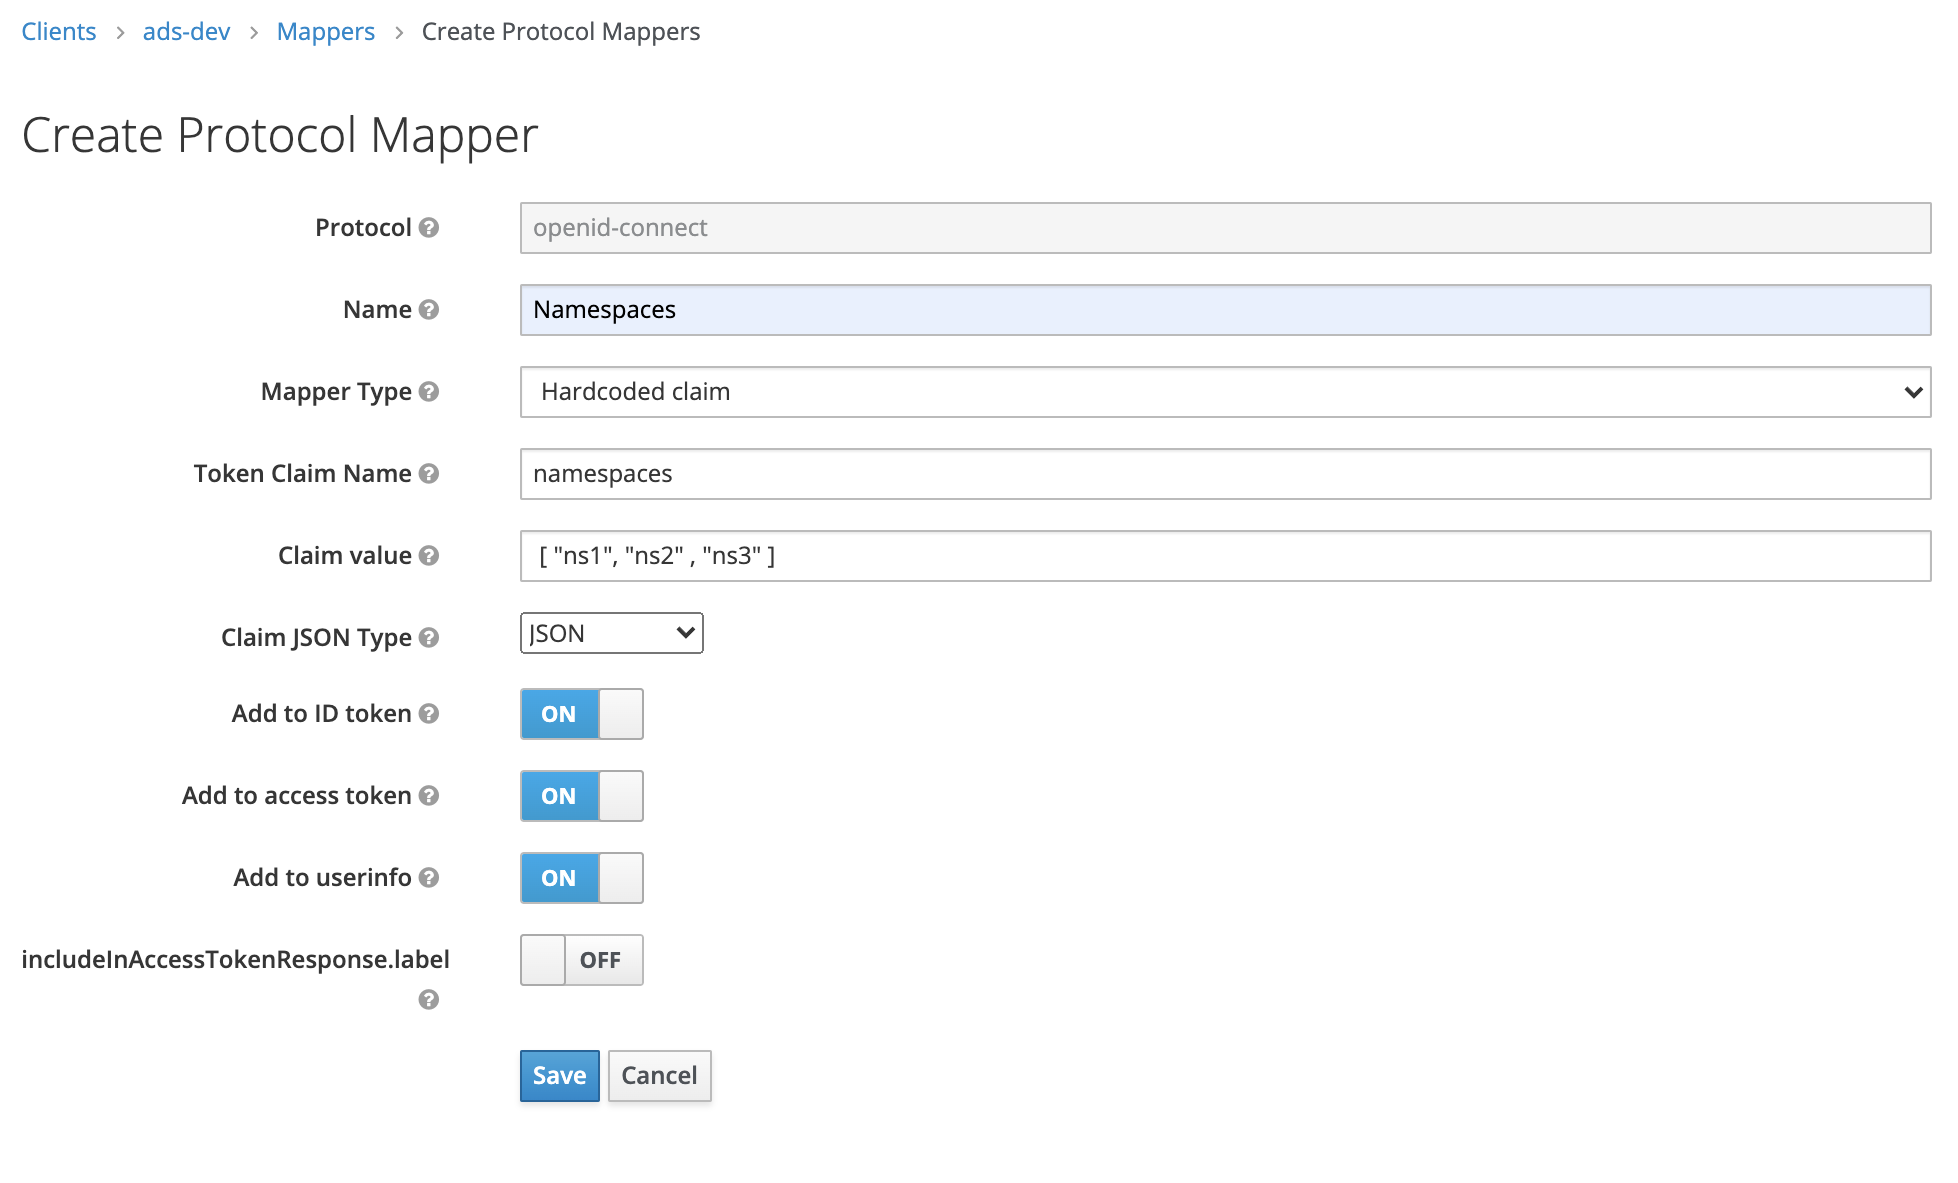
- Enter a name for the Mapper: "Namespaces".
- In the Mapper Type drop-down menu, select "Hardcoded claim".
- Set the Token Claim Name to
namespaces. (This setting is critical. The Token Claim Name is case sensitive and must be entered exactly like this.) - In the field Claim value, list the namespaces, which in ASM are equivalent to projects, that the client should have access to (a JSON Array of strings: [ "ns1", "ns2" , "ns3" ]).
- In the Claim JSON Type drop-down menu, select "JSON".
- Leave the other settings at their defaults.
- Click Save to save the mapper.
Step 3: Create the openId Client Scope
- In the Configure section on the left, click Client Scopes.
- The Client Scopes view is displayed.
- Click the Create button at the top right of the table.
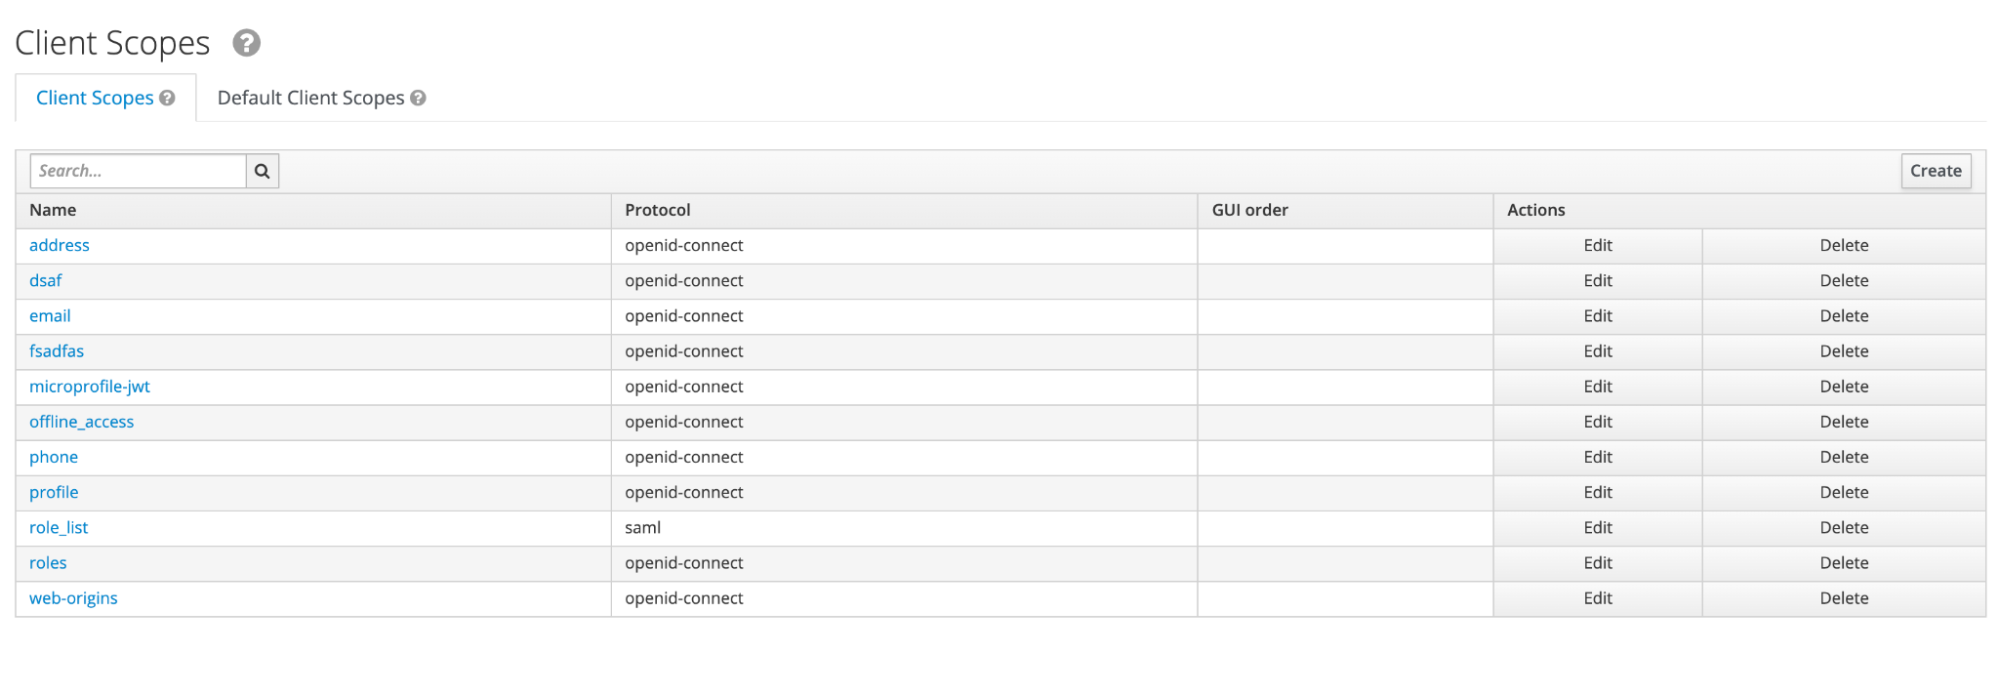
The Add client scope view is displayed.
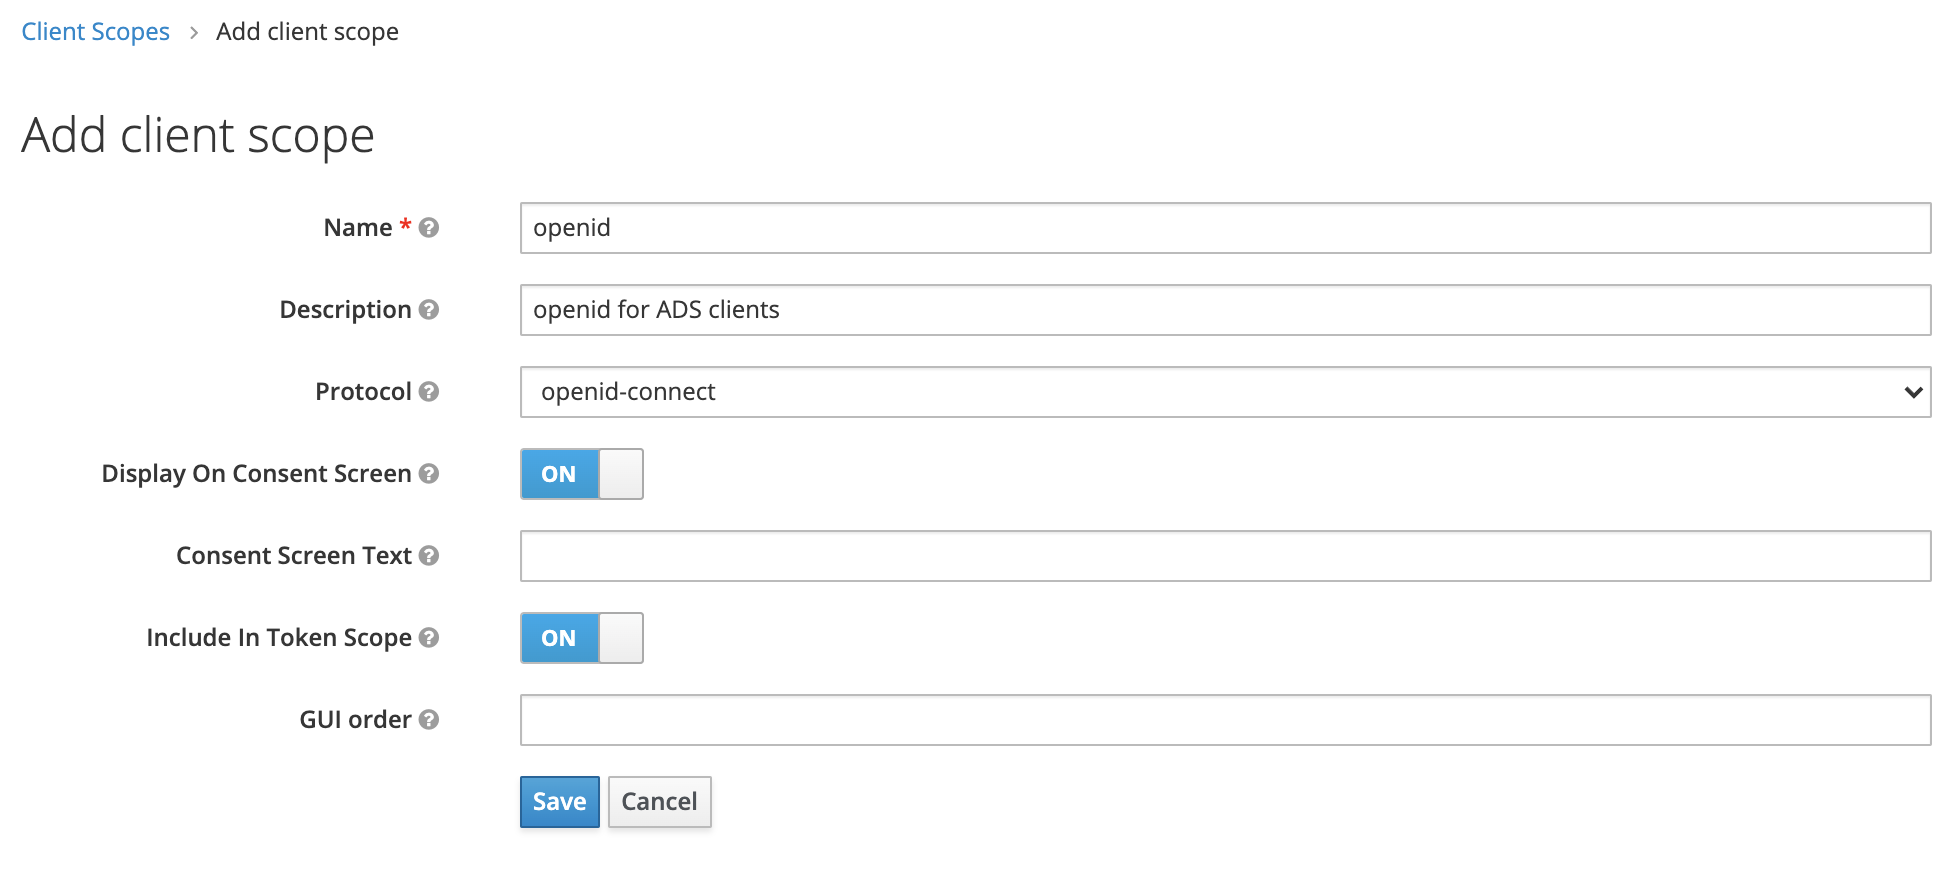
- Enter a name for the client scope: "openid".
- Enter a Description to clarify the purpose of this client scope (optional).
- In the Protocol drop-down menu, select "openid-connect".
- Leave the other settings at their defaults.
- Click Save to save the mapper.
Step 4: Create the Client Scope Mapper
- Access the client scope configuration page for the scope you created in step 3.
- Go to the Mappers tab.
- Click the Create button at the top right of the table.

The Create Protocol Mapper view is displayed.
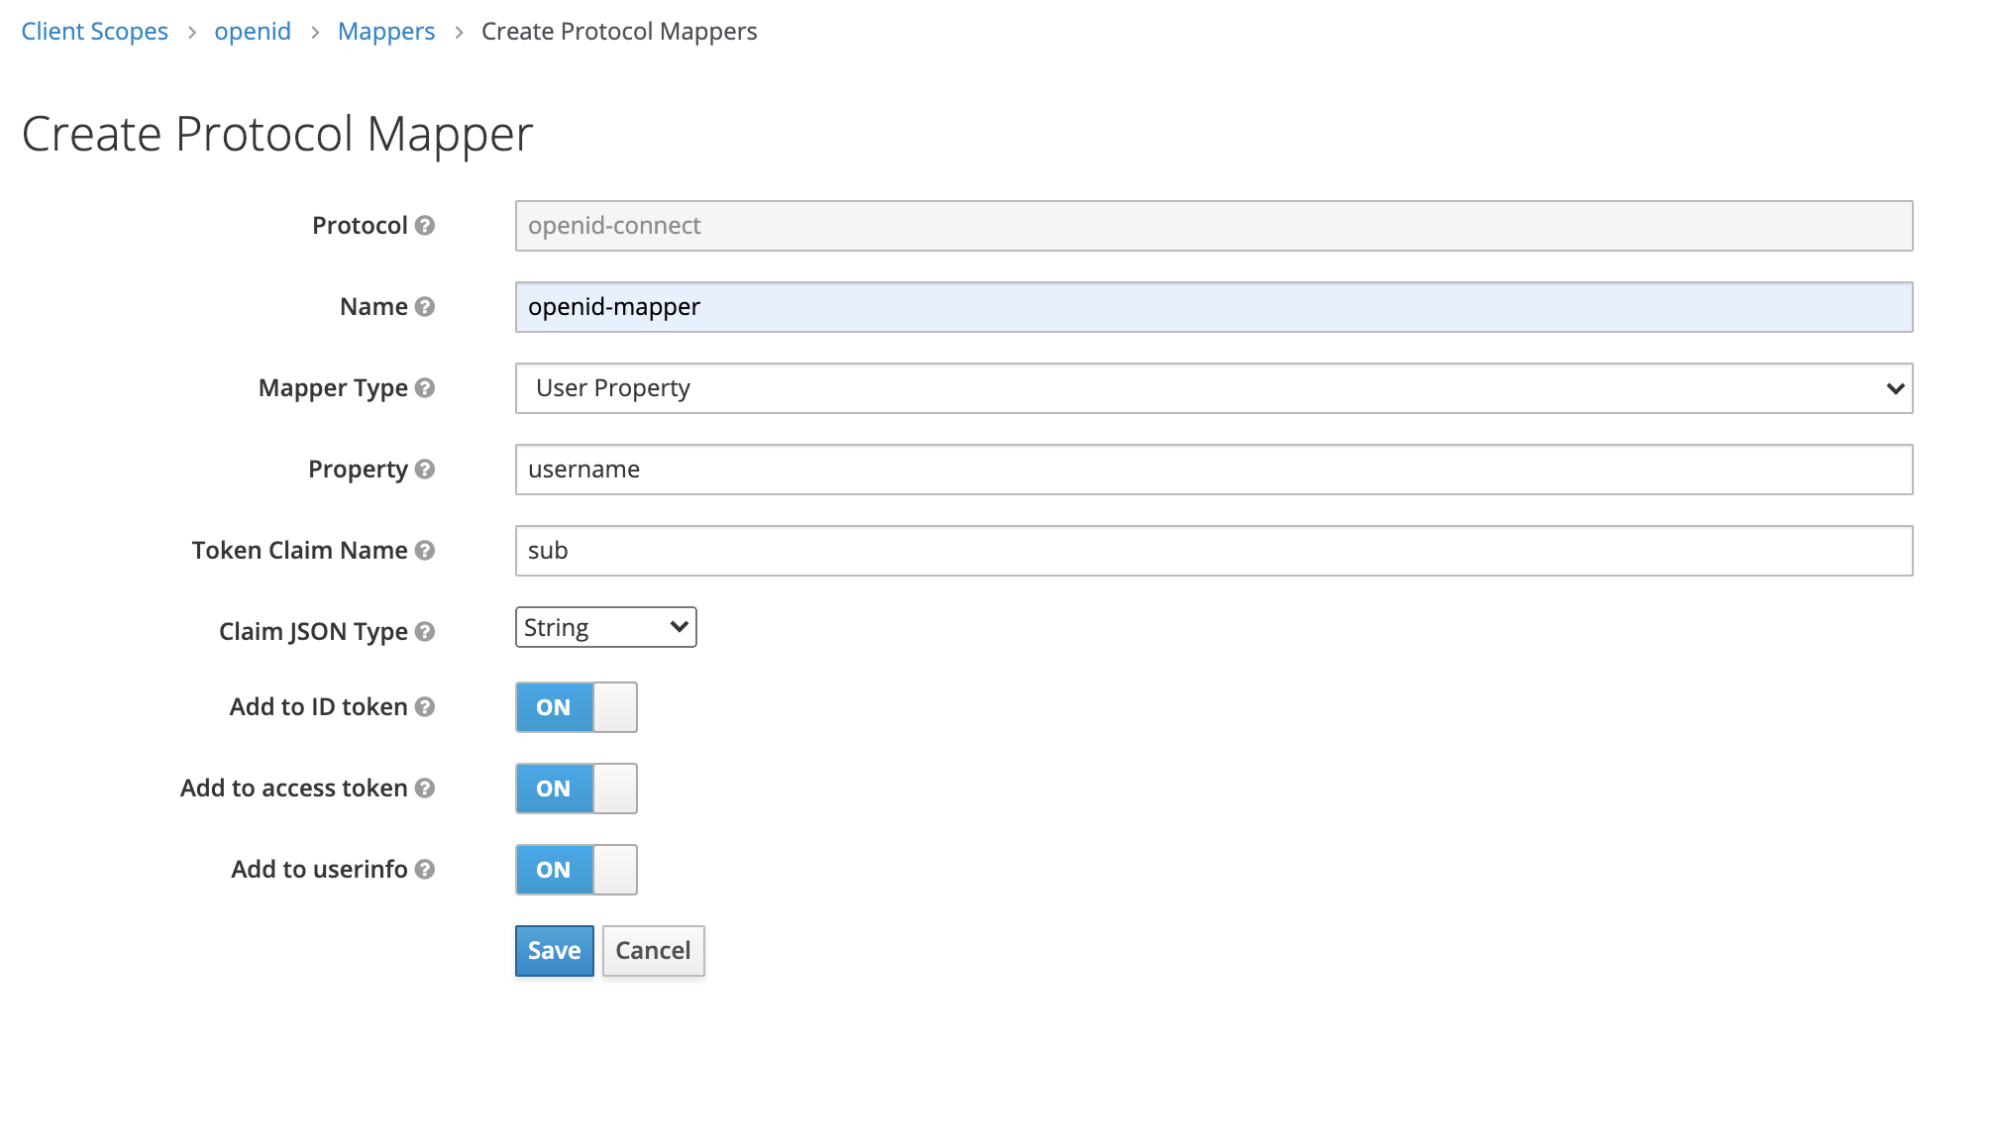
- Enter a name for the mapper, for example, "openid-mapper".
- In the Mapper Type drop-down menu, select "User Property".
- In the Property field, enter
username. (This setting is critical. The Property is case sensitive and must be entered exactly like this.) - Set the Token Claim Name to
sub. (This setting is critical. The Token Claim Name is case sensitive and must be entered exactly like this.) - In the Claim JSON Type drop-down menu, select "String".
- Leave the other settings at their defaults.
- Click Save to save the mapper.
Step 5: Assign the new client scope as the default for the client
- After creating the client scope (openid) and defining the relevant mapper (openid-mapper), return to the client you created in step 1.
- Go to the Client Scopes tab.
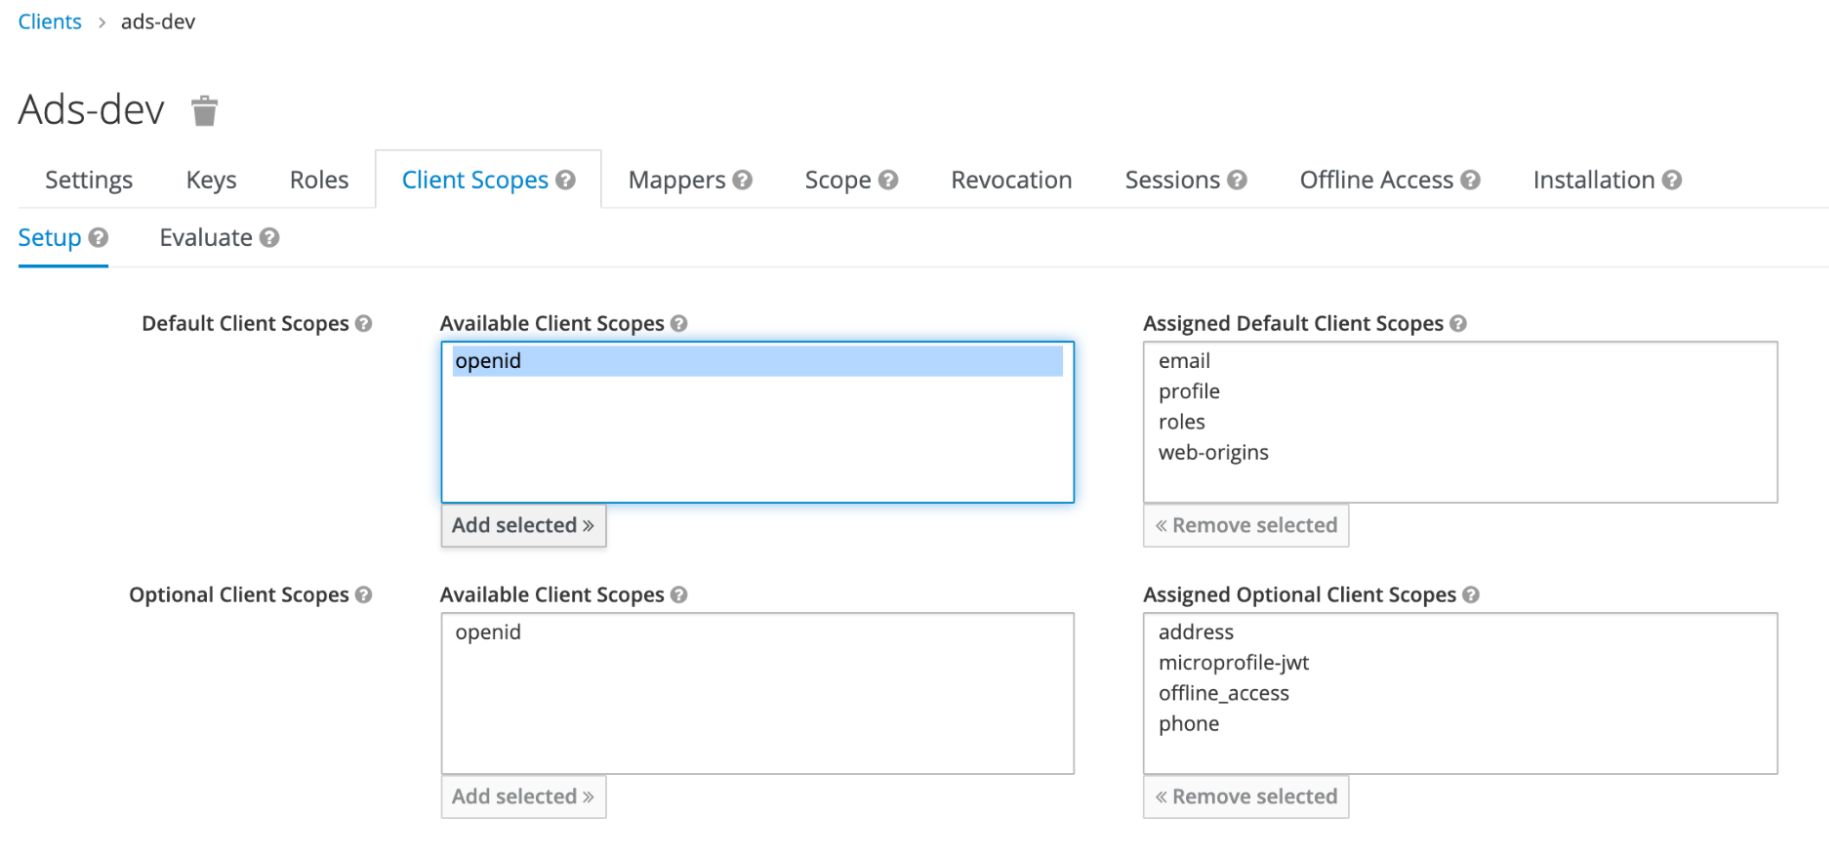
There you will find the new "openid" client scope ready for use.
- Select the "openid" client scope in the Available Client Scopes column in the Default Client Scopes section.
- Click the Add selected button to assign it to the Assigned Default Client Scopes column.
- Now, each time the new client is used, the "openid" client scope will be fetched by default.
This concludes the configuration of the Keycloak client for ADS.